Cherry Danish Recipe
Introduction
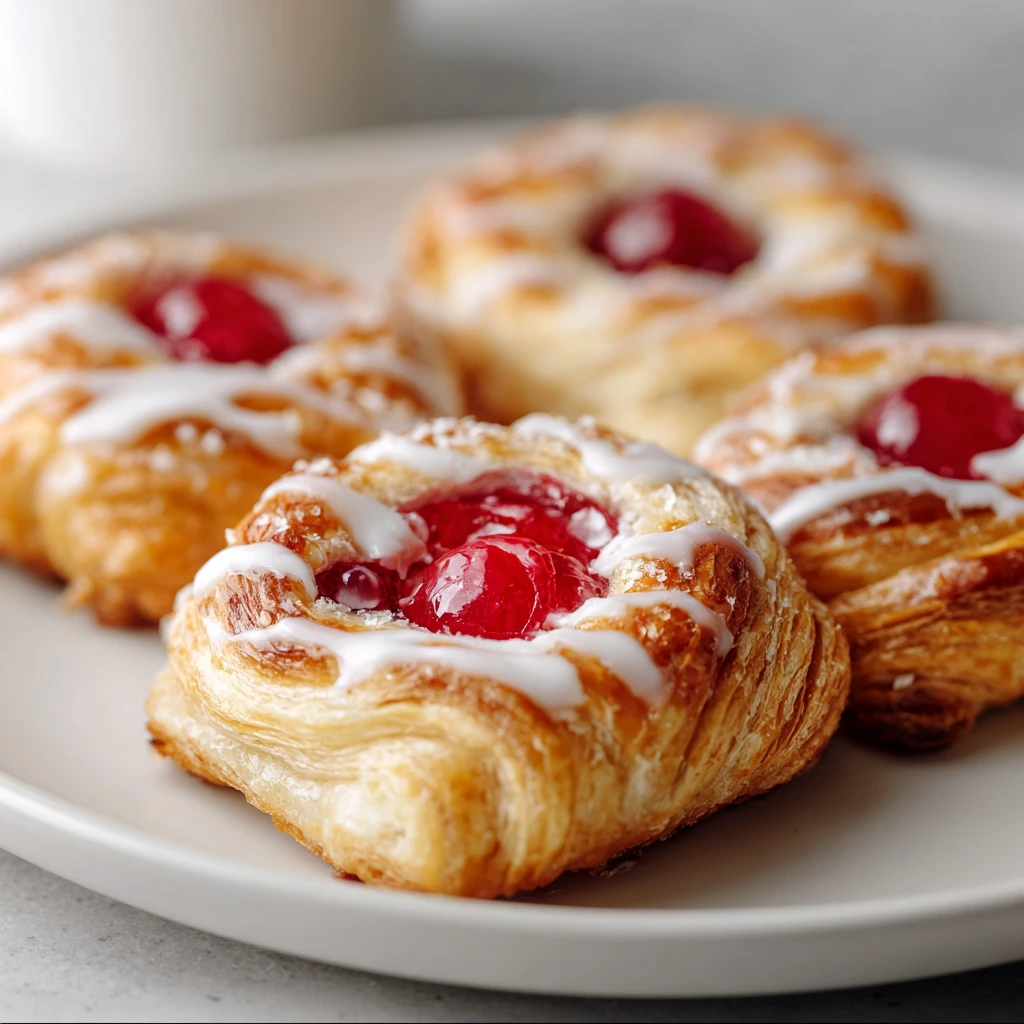
Welcome to a delightful journey into the world of pastries with a cherry danish recipe that will tantalize your taste buds and fill your kitchen with the warm aroma of freshly baked goodness. Imagine a flaky, buttery pastry enveloping a sweet and tangy cherry filling, creating a perfect balance of flavors and textures. This recipe is not just a culinary delight but a nostalgic reminder of cozy mornings and sweet indulgences.
Cherry danish holds a special place in many hearts, whether enjoyed as a breakfast treat, a dessert, or a snack with a cup of coffee. Its origins can be traced back to the rich culinary heritage of Danish pastries, known for their intricate layering and exquisite fillings. The combination of ripe cherries and delicate pastry is a match made in dessert heaven, offering a perfect blend of fruity sweetness and pastry perfection.
Prepare to embark on a baking adventure that will reward you with a delectable treat that is sure to impress family and friends. With a few simple ingredients and some patience, you can create a cherry danish that rivals those found in the finest bakeries. So, roll up your sleeves, preheat the oven, and let’s dive into the art of making this irresistible pastry.
In this article, we will explore the step-by-step process of creating a cherry danish from scratch, offering expert tips, creative variations, and serving suggestions to elevate your baking experience. Get ready to unleash your inner pastry chef and master the art of cherry danish creation!
Why You’ll Love This Recipe
Prepare to fall in love with this cherry danish recipe for its irresistible combination of flavors and textures. The buttery and flaky pastry pairs perfectly with the sweet and tangy cherry filling, creating a symphony of taste in every bite. Whether you’re a seasoned baker or a novice in the kitchen, this recipe is designed to be approachable, rewarding, and utterly delicious.
One of the best features of this cherry danish recipe is its versatility. You can enjoy it as a breakfast pastry, a dessert after a hearty meal, or a special treat to accompany your afternoon tea. The homemade goodness of this pastry will make you appreciate the art of baking and the joy of sharing homemade treats with your loved ones.
Moreover, this cherry danish recipe can be tailored to suit various dietary preferences. You can easily adjust the sweetness level, experiment with different fillings, or even try a gluten-free or vegan version of the pastry. The possibilities are endless, allowing you to customize this recipe to your liking and dietary needs.
Get ready to indulge in a culinary experience like no other with this cherry danish recipe that promises to delight your senses and bring a touch of sweetness to your everyday life.
Ingredients
Before we dive into the art of making cherry danish, let’s gather all the essential ingredients you’ll need to create this delectable pastry:
– All-purpose flour
– Unsalted butter
– Granulated sugar
– Salt
– Active dry yeast
– Warm milk
– Eggs
– Cherry pie filling
– Powdered sugar (for glaze)
Feel free to explore optional ingredient substitutions, such as using almond extract for added flavor, incorporating fresh cherries for a more vibrant filling, or experimenting with different types of sugar for a unique twist. Let your creativity shine as you customize this recipe to suit your taste preferences.
Step-by-Step Instructions
Now that you have all your ingredients ready, let’s embark on the journey of creating a mouthwatering cherry danish from scratch. Follow these simple steps to master the art of pastry-making:
Step 1: Prepare the Dough
In a mixing bowl, combine flour, sugar, salt, and yeast. Add in warm milk and beaten eggs, then mix until a dough forms. Knead the dough until smooth and elastic, then let it rise until doubled in size.
Step 2: Roll Out the Dough
Roll out the dough into a rectangle and spread softened butter over the surface. Fold the dough into thirds like a letter, then roll it out again. Repeat this process twice more to create layers.
Step 3: Add the Filling
Spread cherry pie filling over the dough, leaving a border around the edges. Roll up the dough lengthwise and seal the seam. Cut slits along the top of the dough to allow steam to escape while baking.
Step 4: Bake to Perfection
Place the prepared danish on a baking sheet and let it rise for a final time. Bake in a preheated oven until golden brown and fragrant. Once baked, drizzle with powdered sugar glaze for a finishing touch.
With these simple steps, you can create a stunning cherry danish that will impress your guests and leave them craving for more. Don’t be afraid to experiment with different fillings or shapes to add your unique touch to this classic pastry.
Expert Tips for Success
To ensure your cherry danish turns out perfectly every time, here are some expert tips to keep in mind:
– Use high-quality ingredients for the best flavor and texture.
– Make sure your yeast is fresh and active to ensure proper rising of the dough.
– Allow the dough to rise in a warm, draft-free environment for optimal results.
– Brush the danish with an egg wash before baking to achieve a golden-brown crust.
By following these tips and tricks, you’ll be on your way to mastering the art of making cherry danish like a seasoned baker. Embrace the process, enjoy the journey, and savor the delicious results of your baking endeavors.
Variations and Substitutions
While the classic cherry danish recipe is a timeless favorite, feel free to explore creative variations and substitutions to customize this pastry to your liking:
Ingredient Swaps:
– Swap cherry pie filling with blueberry or apple for a different fruity twist.
– Replace sugar with honey or maple syrup for a natural sweetness.
Dietary Modifications:
– Use gluten-free flour for a gluten-free version of the pastry.
– Substitute eggs with flax eggs for a vegan-friendly alternative.
By experimenting with different ingredients and flavors, you can create a cherry danish that suits your taste preferences and dietary needs. Let your imagination run wild as you explore the endless possibilities of pastry customization.
Serving Suggestions
Once your cherry danish is fresh out of the oven and beautifully glazed, it’s time to enjoy this delightful pastry to the fullest. Here are some serving suggestions to elevate your cherry danish experience:
– Serve warm slices of cherry danish with a dollop of whipped cream or vanilla ice cream for a decadent dessert.
– Pair your pastry with a hot cup of coffee or tea to complement the sweet flavors of the cherry filling.
– Garnish your cherry danish with fresh mint leaves or a sprinkle of powdered sugar for an extra touch of elegance.
Whether enjoyed as a solo indulgence or shared with loved ones, your cherry danish is sure to be a crowd-pleaser that brings joy and satisfaction with every bite. Embrace the moment, savor the flavors, and create lasting memories with this delectable pastry.
FAQs
Q: Can I make the cherry danish dough ahead of time?
A: Yes, you can prepare the dough in advance and refrigerate it overnight. Simply let the dough come to room temperature before rolling it out and adding the filling.
Q: How long does the cherry danish stay fresh?
A: The cherry danish can be stored in an airtight container at room temperature for up to 2-3 days. You can also freeze the pastry for longer storage and reheat it in the oven before serving.
Q: Can I use fresh cherries instead of cherry pie filling?
A: Yes, fresh cherries can be used for a more vibrant and natural filling. Simply pit and chop the cherries before spreading them over the dough.
Q: How can I prevent the cherry filling from leaking out during baking?
A: Make sure to leave a border around the edges of the dough when adding the filling and seal the danish tightly to prevent leakage. You can also brush the edges with egg wash for added security.
Final Thoughts
As you reach the end of this culinary journey into the realm of cherry danish, we hope you’ve been inspired to roll up your sleeves, preheat your oven, and create a masterpiece of pastry perfection. The art of making cherry danish is not just about following a recipe; it’s about embracing creativity, exploring flavors, and sharing homemade delights with those you love.
So, gather your ingredients, follow the steps with care, and watch as a simple mixture of flour, butter, and cherries transforms into a work of art that brings smiles and satisfaction. Let the sweet aroma of freshly baked pastry fill your kitchen, inviting warmth and joy into your home.
Remember, the beauty of baking lies in the joy of creating something special from scratch, infusing love and care into every fold of dough and every spoonful of filling. Cherish the process, celebrate the results, and relish the moments shared over a delicious slice of cherry danish.
Thank you for joining us on this flavorful adventure. May your cherry danish be a symbol of your culinary passion, your creative spirit, and your love for all things sweet and indulgent. Happy baking!
Cherry Danish Recipe
Indulge in the delightful combination of buttery, flaky pastry and sweet-tangy cherry filling with this irresistible cherry danish recipe. Perfect for breakfast, dessert, or a sweet snack, this pastry will impress your guests and elevate your baking skills.
Ingredients
- 2 cups all-purpose flour
- 1/2 cup unsalted butter, softened
- 1/4 cup granulated sugar
- 1/2 teaspoon salt
- 1 tablespoon active dry yeast
- 1/2 cup warm milk
- 2 eggs
- 1 can cherry pie filling
- 1/2 cup powdered sugar
Directions
-
In a mixing bowl, combine flour, sugar, salt, and yeast. Add warm milk and beaten eggs. Knead the dough until smooth, then let it rise.
-
Roll out the dough into a rectangle, spread softened butter, fold into thirds, and repeat to create layers.
-
Spread cherry pie filling over the dough, roll up lengthwise, and seal the seam. Cut slits on top.
-
Place on a baking sheet, let it rise, then bake until golden brown. Drizzle with powdered sugar glaze.
-
Enjoy slices warm with whipped cream, coffee, or tea.
-
Store in an airtight container for up to 2-3 days.