

Chocolate No Bake Cheesecake Recipe: Simple No Bake Dessert with Just 2 Hour Chill Time
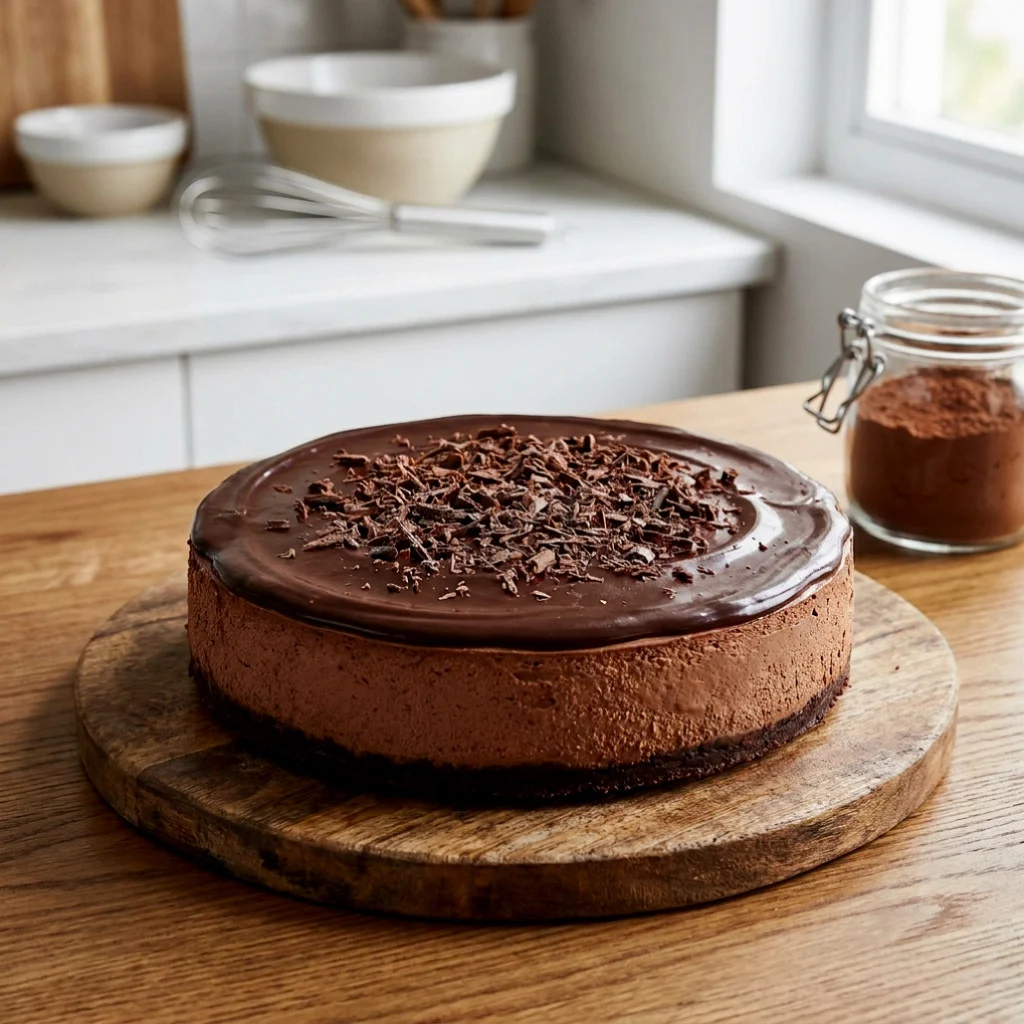
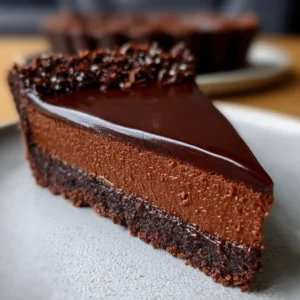
If you’re searching for a dessert that’s both delicious and easy to prepare, look no further than this Chocolate No Bake Cheesecake recipe. With its creamy chocolate filling and buttery crust, this dessert is perfect for any occasion and requires just a two-hour chill time. Whether you’re hosting a party or simply satisfying a sweet tooth, this easy no bake cheesecake recipe is sure to impress. Its rich, velvety texture is a delightful treat that will leave your guests asking for seconds!
Ingredients
For the Crust
- 1 ½ cups graham cracker crumbs: Use finely crushed graham crackers for a smooth crust. If you prefer a more robust flavor, consider using chocolate graham crackers.
- ½ cup unsalted butter, melted: Ensure the butter is unsalted to maintain control over the sweetness of the cheesecake.
- ¼ cup granulated sugar: This adds sweetness and helps bind the crust together. You can also use brown sugar for a slightly different flavor profile.
For the Chocolate Cheesecake Filling
- 16 oz cream cheese, softened: It’s vital that the cream cheese is at room temperature to ensure a smooth filling. Full-fat cream cheese works best for creaminess.
- 1 cup powdered sugar: This sweetens the filling without adding graininess, ensuring a smooth texture.
- 1 cup heavy whipping cream: Make sure it’s cold before whipping for optimal volume and stability.
- 1 cup semi-sweet chocolate chips, melted: Choose high-quality chocolate for the best flavor. Dark chocolate can be used for a richer taste.
- 1 teaspoon vanilla extract: Adds a lovely background flavor that complements the chocolate beautifully.
For Topping (Optional)
- Chocolate shavings or chips: Use a vegetable peeler to create elegant shavings from a chocolate bar for a decorative touch.
- Whipped cream: Freshly whipped cream is preferred for its lightness, but store-bought can work in a pinch.
- Fresh berries (like raspberries or strawberries): The tartness of berries provides a wonderful contrast to the rich chocolate, enhancing the overall dessert experience.
Special Notes: For optimal flavor and texture, use full-fat cream cheese and high-quality chocolate chips. You can substitute gluten-free graham crackers if needed. Additionally, feel free to adjust the sugar levels according to your taste preferences. You can learn more about this topic.
Steps / Instructions
- Prepare the crust: In a medium bowl, combine the graham cracker crumbs, melted butter, and granulated sugar. Mix until the crumbs are evenly coated and resemble wet sand. This mixture should hold together when pressed.
- Form the crust: Press the crumb mixture firmly into the bottom of a 9-inch springform pan. Use the back of a measuring cup or your fingers to create an even layer. Ensure the crust is packed tightly to prevent it from crumbling later. Place the crust in the refrigerator to set while you prepare the filling.
- Melt the chocolate: In a microwave-safe bowl, melt the semi-sweet chocolate chips in 30-second intervals, stirring in between, until completely melted and smooth. Allow it to cool slightly; this helps prevent the chocolate from curdling the cream cheese.
- Beat the cream cheese: In a large mixing bowl, beat the softened cream cheese with an electric mixer until smooth and creamy, about 2-3 minutes. Scrape down the sides of the bowl to ensure an even mix.
- Add the sugar: Gradually add the powdered sugar to the cream cheese while continuing to mix until well combined and fluffy. This incorporation helps to avoid lumps and ensures a silky filling.
- Incorporate the chocolate: Add the melted chocolate and vanilla extract to the cream cheese mixture, beating until fully incorporated and smooth. Taste for sweetness and adjust if necessary.
- Whip the cream: In a separate bowl, whip the heavy cream until stiff peaks form. This should take about 3-5 minutes. Be careful not to over-whip, as it can become grainy; the cream should be thick but still glossy.
- Fold the whipped cream: Gently fold the whipped cream into the chocolate cheesecake mixture, being careful not to deflate the whipped cream. Use a spatula to incorporate the whipped cream in stages, ensuring a light and airy filling.
- Fill the crust: Pour the chocolate cheesecake filling into the prepared crust, smoothing the top with a spatula. Tap the pan gently on the counter to eliminate any air bubbles trapped in the filling.
- Chill: Cover the cheesecake with plastic wrap and refrigerate for at least 2 hours until it sets. For best results, let it chill longer if time permits to achieve the perfect texture.
Tips & Tricks
To achieve the best results with your Chocolate No Bake Cheesecake, consider these expert tips: Check out our related guide for more tips. These strategies will not only enhance your cheesecake but also streamline your preparation process.
- Storage: Keep leftovers covered in the refrigerator for up to 3 days. It’s best served chilled, and the flavors will continue to develop as it sits.
- Make-ahead option: This cheesecake can be made a day in advance. Just prepare the filling and crust, and let it chill overnight. This allows the flavors to meld beautifully.
- Common mistakes: Avoid over-whipping the heavy cream as it can turn grainy. Also, ensure your cream cheese is softened to avoid lumps, which can disrupt the smooth texture of the filling.
- Pro technique: For a more decadent flavor, consider adding a tablespoon of espresso powder to the chocolate mixture to enhance the chocolate flavor. This subtle addition will elevate the chocolate experience significantly.
Variations
While this Chocolate No Bake Cheesecake is perfect as is, you can experiment with the following options:
- Flavor variations: Incorporate orange zest for a citrus twist or use peppermint extract for a festive flavor during the holidays. Adding a swirl of fruit puree can also bring a refreshing element.
- Dietary alternatives: Use vegan cream cheese and whipped coconut cream for a dairy-free version. For gluten-free, use gluten-free graham crackers or nuts for the crust. Adjust the sugar content if using alternative sweeteners.
- Ingredient swaps: Substitute the semi-sweet chocolate with dark chocolate for a richer taste or milk chocolate for a sweeter flavor. You can also add a hint of sea salt to enhance the chocolate’s richness.
Serving Suggestions
To serve your Chocolate No Bake Cheesecake, consider these delightful suggestions:
- Top with chocolate shavings or a drizzle of chocolate sauce for an elegant presentation. This adds a layer of visual appeal and extra chocolate flavor.
- Add a dollop of whipped cream and fresh berries on the side for a burst of color and flavor. The berries’ acidity complements the sweetness of the cheesecake beautifully.
- Pair with a cup of coffee or a glass of dessert wine for a complete indulgent experience. A rich red wine or a sweet dessert wine can enhance the chocolate flavor.
FAQ
Can I freeze the cheesecake? Yes, you can freeze the cheesecake for up to 3 months. Thaw it in the refrigerator before serving to maintain its texture and flavor. Wrap it tightly to prevent freezer burn.
How long can the cheesecake sit out? It’s best to keep the cheesecake refrigerated. If left out, consume within 2 hours to ensure it retains its freshness and safety for consumption.
Chocolate No Bake Cheesecake
A delicious and easy no bake dessert with a creamy chocolate filling and buttery crust, perfect for any occasion.
Ingredients
- 1 ½ cups graham cracker crumbs
- ½ cup unsalted butter, melted
- ¼ cup granulated sugar
- 16 oz cream cheese, softened
- 1 cup powdered sugar
- 1 cup heavy whipping cream
- 1 cup semi-sweet chocolate chips, melted
- 1 teaspoon vanilla extract
- Chocolate shavings or chips (optional)
- Whipped cream (optional)
- Fresh berries (optional)
Directions
Prepare the crust: In a medium bowl, combine the graham cracker crumbs, melted butter, and granulated sugar. Mix until the crumbs are evenly coated and resemble wet sand. This mixture should hold together when pressed.
Form the crust: Press the crumb mixture firmly into the bottom of a 9-inch springform pan. Use the back of a measuring cup or your fingers to create an even layer. Ensure the crust is packed tightly to prevent it from crumbling later. Place the crust in the refrigerator to set while you prepare the filling.
Melt the chocolate: In a microwave-safe bowl, melt the semi-sweet chocolate chips in 30-second intervals, stirring in between, until completely melted and smooth. Allow it to cool slightly.
Beat the cream cheese: In a large mixing bowl, beat the softened cream cheese with an electric mixer until smooth and creamy, about 2-3 minutes. Scrape down the sides of the bowl to ensure an even mix.
Add the sugar: Gradually add the powdered sugar to the cream cheese while continuing to mix until well combined and fluffy.
Incorporate the chocolate: Add the melted chocolate and vanilla extract to the cream cheese mixture, beating until fully incorporated and smooth.
Whip the cream: In a separate bowl, whip the heavy cream until stiff peaks form, about 3-5 minutes.
Fold the whipped cream: Gently fold the whipped cream into the chocolate cheesecake mixture, being careful not to deflate the whipped cream.
Fill the crust: Pour the chocolate cheesecake filling into the prepared crust, smoothing the top with a spatula. Tap the pan gently on the counter to eliminate any air bubbles.
Chill: Cover the cheesecake with plastic wrap and refrigerate for at least 2 hours until it sets.
Nutrition Facts
Recipe Reviews
- ★★★★★
Excellent recipe!
Leave a Reply
Your email address will not be published. Required fields are marked *




Excellent recipe!